

Scheduling a project in Microsoft Project Professional is something most Project Managers are very familiar with. They use the tool in their day to day life to manage projects of varying sizes to completion, but really it takes many years to become fully proficient in the use of the tool.
I think the challenge many project managers find with scheduling is to be able to build a schedule that actually helps them manage their projects rather than hinders them until the schedule becomes just another system that needs to be updated for management’s purposes.
In this blog, I’d like to share my journey on how I got from seeing the “schedule” as a burden to making it work for me and help me get answers to my managers and clients. It is important to note that the project schedules that I discuss here are medium size projects that consist of around 50-60 line items. I believe that larger project schedules, due to their complexity and priority, warrant the need for a dedicated resource to manage them alongside the project manager. When I say “larger” project schedules, I refer to projects that take many years to complete, utilise hundreds of resources and cost millions.
Setting up the Schedule
My experience tells me that the easiest and most practical way to build a good schedule is to follow these steps:
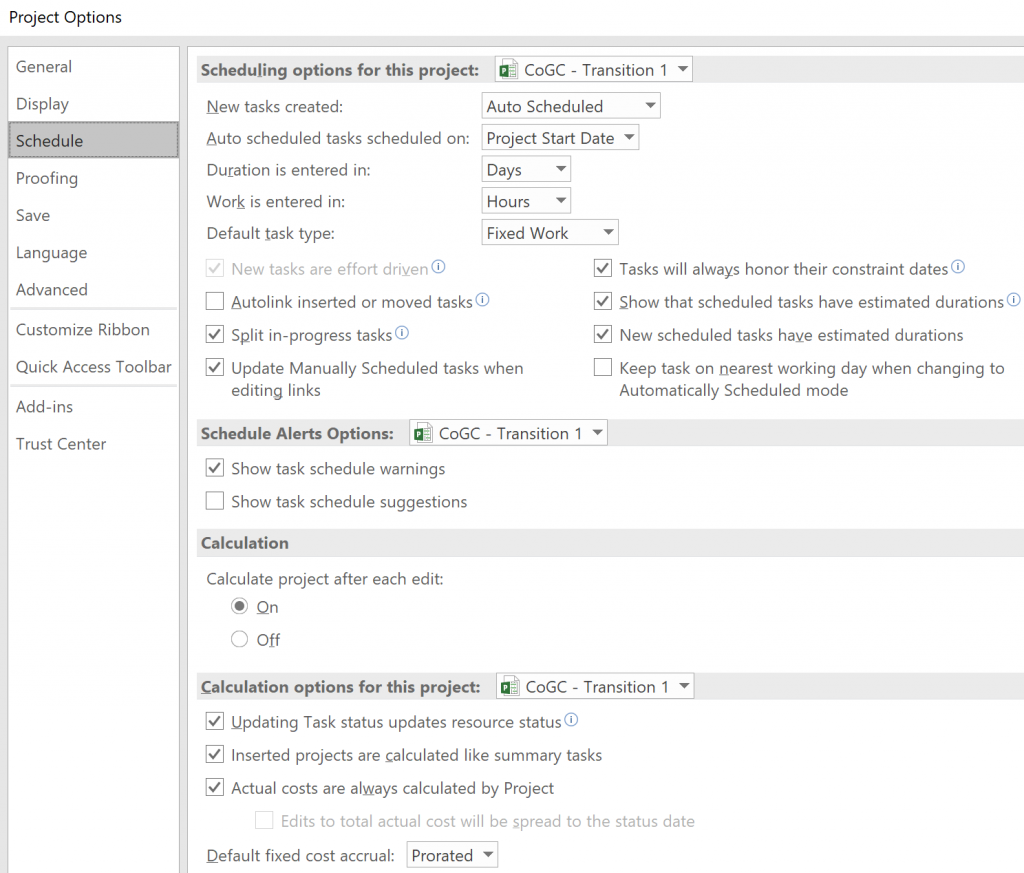
- Ensure the settings of your schedule are correct:
- Click on File -> Options
- In the Schedule section, these are the recommended settings that will make the schedule flow well and predict project outcomes in terms of time, costs and resources:
- Insert line 0 if not already there:

3. Make sure your project has the right Start Date
4. List the project activities – at this stage just think of them as a task list, write down what activity comes first and what follows in chronological order. You can group project activities relating to the same project phase and/or stage by creating indented subtasks that belong to summary tasks
5. Link any tasks together that need to be linked
6. Indicate the duration of each task
7. Put resources on the tasks – if your resources have been set up with fee rates, your project cost will also be calculated
8. Set up cost resources and add them to tasks if relevant
9. Set up Milestones, Deadlines and Baseline the project schedule according to your organisation’s processes
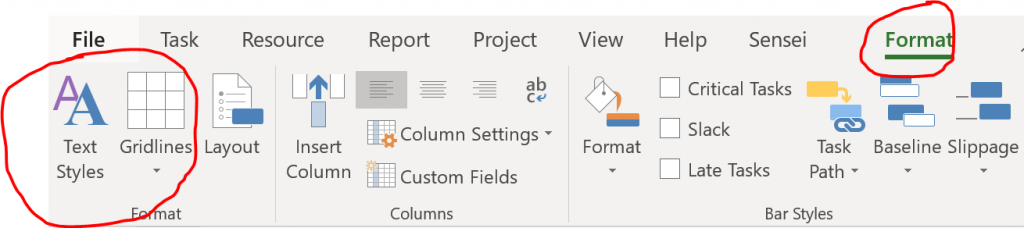
10. Create formatting rules for your tasks:
- That’s it! By following the above steps, your schedule should be able to predict when the project finishes, how much it will cost and what resources it will utilise.
Managing the Schedule
The following is a list of suggested weekly activities to update a project schedule – your organisation might have slightly different practices however at a minimum, these activities should be carried out regardless:
1. Indicate Actual hours spent by resources on tasks either through timesheets or manual update
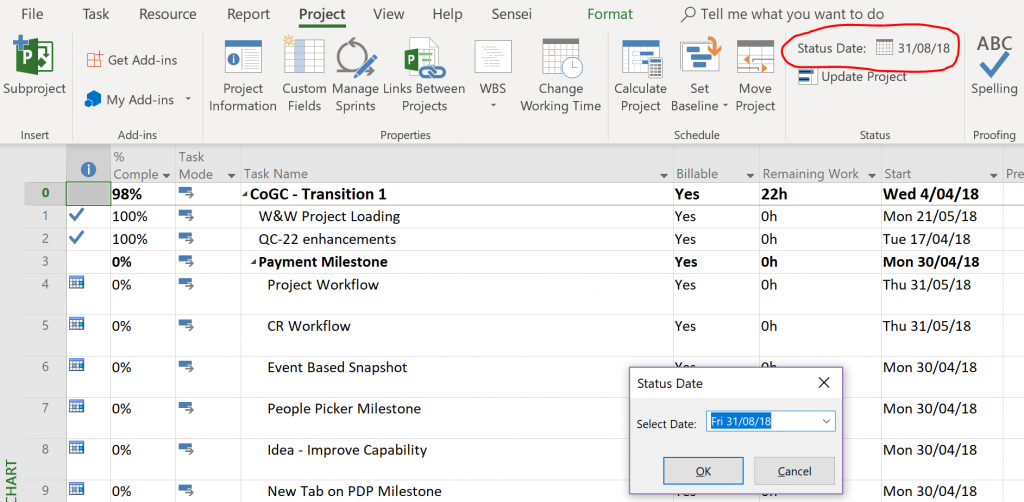
2. Set a Status Date – this should be the date resources are required to submit their timesheets or if timesheets are not used then the date the resources reported actuals against the tasks:
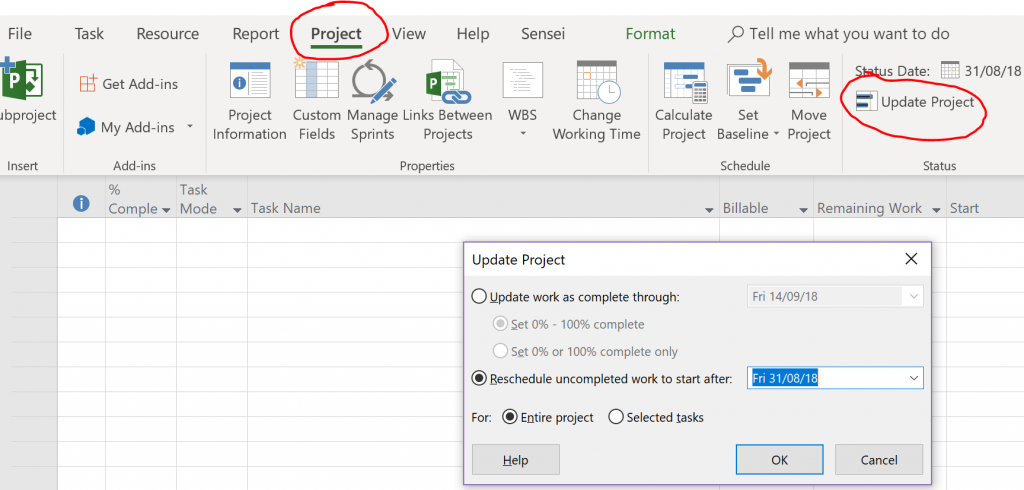
- Ensure that there is no incomplete work in the past – there are 3 ways to do this:
- Automatically adjust the schedule – with this step, all incomplete work in the past will move to the future in the most logical way according to the schedule:
- Use the Gannt to move incomplete work to the future
- Use Task Usage or Resource Usage views to plan future planned hours for resources on tasks – all Work and Actual work should be the same before the Status date and if not, it means you have incomplete work in the past – to easily plug in planned number of hours for tasks or resources, make sure your Timescale is set up correctly:

It then becomes very easy to tell for example how much money has been spent on the project by month and what the plan is for future months:

Hints and Tips – Scheduling best practices
The following hints and tips can help you build a schedule that is simple but informative enough and helps track the project’s progress:
- Length of tasks should not be less than 2 days in Duration
- If a milestone is complete, mark it as Complete
- Work estimate should not be less than 5 hours per task
- Do not allocate resources to summary tasks
- Link the first sub-task in a summary task to the last sub task in the previous summary task rather than linking summary tasks
- Utilise the Task Usage and Resource Usage views to manage work on the Assignment level rather than the task level – this will lead to more accurate time phased project data. Microsoft project spreads planned work equally for each day for the duration of the task which might not always be the case
- Ensure you understand how Duration, Units and Work relate to each other in the schedule: e.g. if your task is Fixed Duration and you change the Work on the task, expect the Units to change, etc
- Do not use constraints unless 100% necessary – all tasks should be As Soon As Possible
- Utilise deadlines, deliverables, Critical path and formatting instead of constraints.
By following these simple steps and utilising a handful of the most useful Microsoft Project functions, you can build yourself a schedule that helps your day to day project management activities and provides meaningful information to management and other stakeholders about the progress of the project. In order to provide the most up to date project information, aim to make these updates to your schedule at least weekly.