
Our team at Sensei recently hosted a webinar where our consultants took the real-world business problem of change requests and showcased a functional solution, see here for an in-depth look into how they did this. We have also now created a short guide demonstrating exactly how you can create an Approval Flow for a Change Request, from creating the solution, editing the entity and forms, and creating the flow.
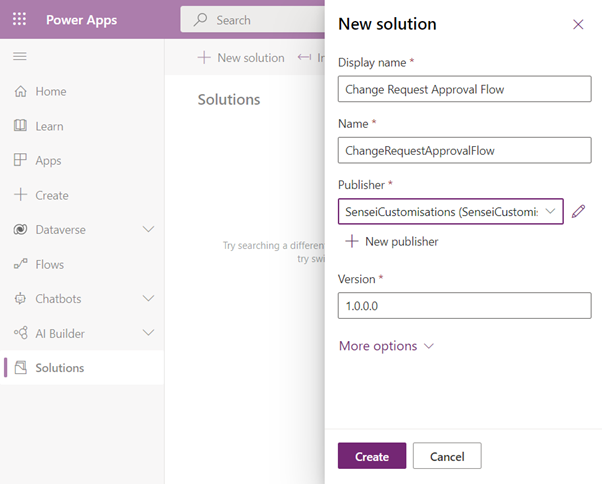
First off, we want to create a new Solution to keep all the relevant entities together and as a best practice.
Now we need to determine how we want the flow to be triggered. There are many different options but for this demonstration, we’re going to go with on creation of the Change Request. Once it’s been created, the approval flow will run. However, you can also have the flow triggered by updating a specific field or by a manual button.
We also need to determine who will be approving these requests. Is it a user that will be selected on the Change Request, or will it be a group of users? For our test, we will select the approver on the request manually through a dropdown.
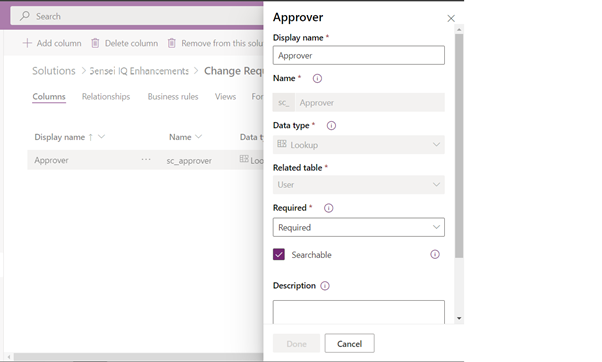
Here I have created a new field on the Change Request table called ‘Approver’, which is a lookup on the User table, this will serve as our selector.
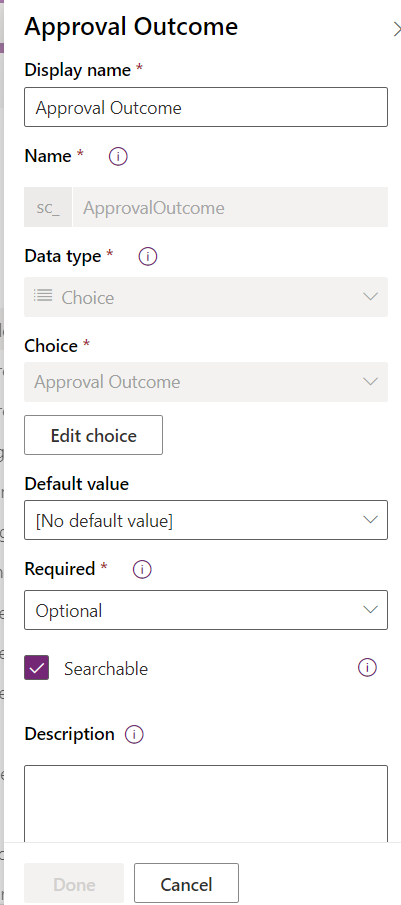
And an Approval Outcome field with the following settings. This will update according to the outcome of the approval.
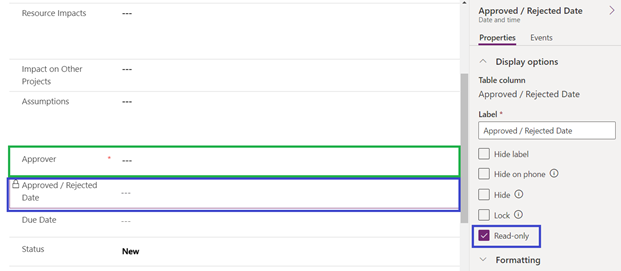
Then, I’ve added this field onto the Change Request Main form. Also hiding the ‘Approved/Rejected By’ and then setting ‘Approved/Rejected Date’ to Read-only. This is because we want to update this field with the outcome of the approval. Make sure to change any other forms as needed.
Now that these fields have been added, we can start building the Approval Flow.
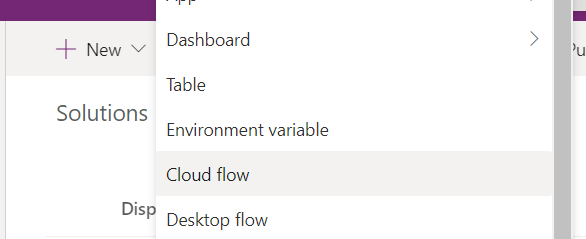
First, we go to create a new flow within our solution. With the solution open, click New and then ‘Cloud Flow’.
This will immediately direct us to the Flow edit. Make sure to Rename the flow in the top left and we can proceed with adding steps to the flow.
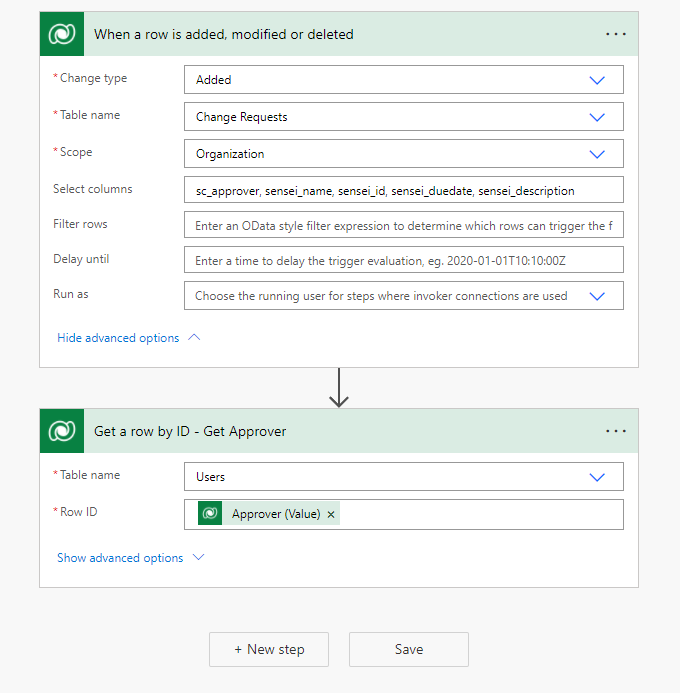
First, set which table we want this flow to run on, and the Change type to ‘Added’
For best practice, it’s a good idea to filter the specific columns that it will check for to only include the ones that will be used. In this case, I have chosen the ‘sc_approver’ field I added earlier, Approver(value), Name, ID, and the fields which I will use in the description.
Then we need to get the User record for the Approver that has been set on the Change Request with the field we created earlier.
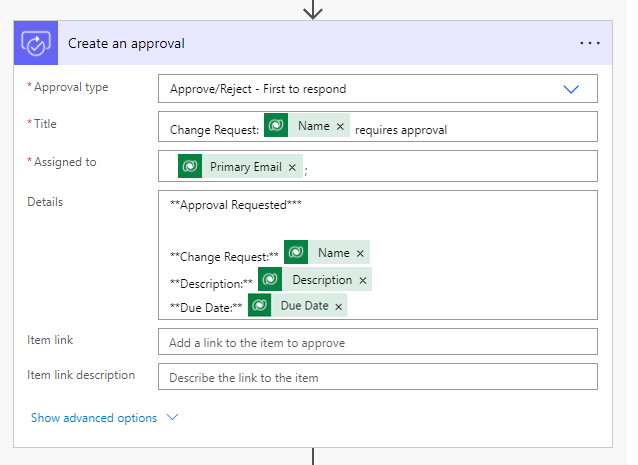
Then create the Approval step. I have selected First to respond, however, there are other options available to suit your requirements. I have then filled in a title and put some information in the Details (Markdown is supported here so you can use this for better formatting. See here for more information).
The Assigned To has been set to the Primary Email of the Approver we got in the last step, and that is where the approval email will be sent.
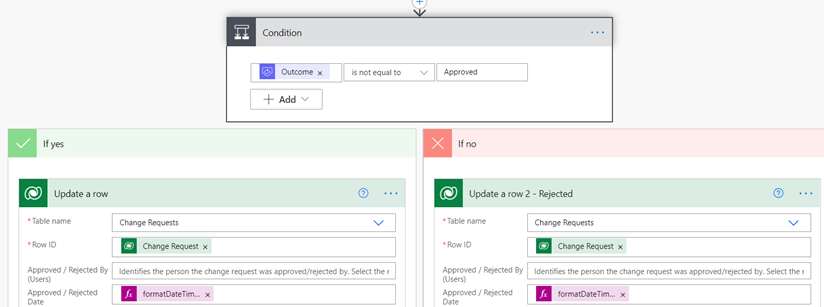
Last of all we need to determine what should occur for each outcome. In this case, I’m just going to update the row and set the Approved/Rejected Date and the Approval Outcome as appropriate. In order to set the date correctly, we need to format it like so ‘dd-mm-yyyy’. I’ve done this here with the following expression. formatDateTime(utcNow(), ‘dd-MM-yyyy’).
And Done 😊
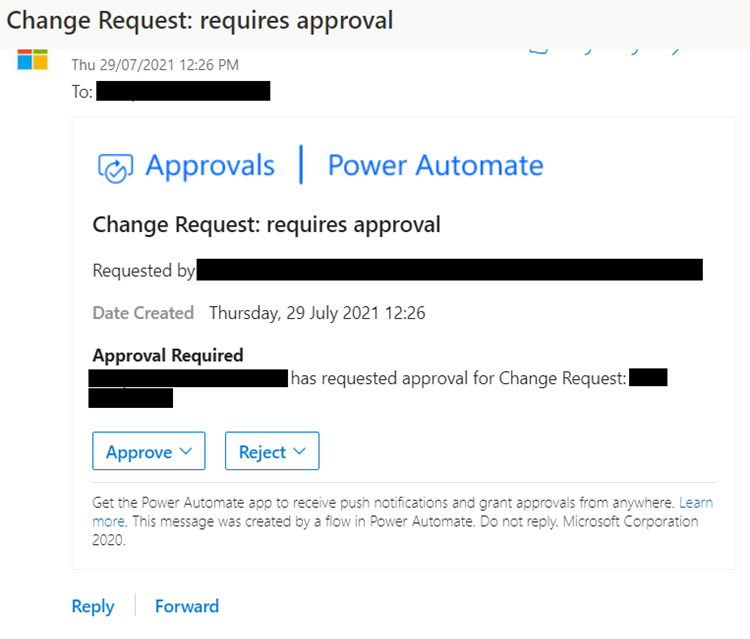
The resulting email will appear looking a little bit like this.
Summary
This is just one way of utilising the Approval Flow functionality within Power Automate. There is a great deal of flexibility when working with flows so be sure to experiment and try things out!
You may be able to come up with creative solutions to improve your own business processes that you hadn’t originally thought possible. Be sure to get in touch with us at Sensei if you have any questions!

By Cameron Finnie
Cameron Finnie joined Sensei in 2021 as a Developer of the Sensei Delivery Team. With a background of development in the Microsoft framework, he is specialising in providing technical solutions and Research & Development to ensure Sensei delivers quality solutions to their clients. Assisting with designing specifications, documentation and sharing of knowledge to help grow both Sensei and its clients. Focused on contributing to client engagements and the Sensei product as a whole.

Stay connected with Sensei
Follow us on LinkedIn for a steady flow of fresh, engaging and insightful content on upcoming webinars, new release blog posts and thought leadership all within the project, portfolio & work management space.